Categories

Digital Photography or how I wasted a Saturday

I started out today to take a couple of pictures of a few weapons to post. However, I got a little anal and wanted to take a descent picture with out the help of photoshop. I started a digital photography class a while back but dropped it after the instructor spent 3 hours going through a book looking at pictures showing one that was with a 18-55 lens and one taken with  a telescopic lens.

So today I just have a few pieces taken at different F stops, ISO and speeds. I also changed the back ground a little to help if needed.

So first off this is my photo tent being used outside with normal lighting.

DSC_4002s

The first set was taken with these settings.


ISO 400
F16
1/1250
And this is how they turn out.
DSC_3967s
DSC_3976s

Way to dark  so I called a friend who does a lot of picture taking and his recommendation for changes to the camera.
second set
ISO 600
F 8
1/250
DSC_3986s
DSC_3982sSo after a little more chatting this is what we came up with for settings.
ISO 400
F 11
1/250
DSC_3992s
DSC_3993s
DSC_3994sAs you can see the pistol frame is looking much better but the rifle receiver is still to washed out.
Same settings but with a darker back ground.
DSC_4000sYou can see that the trigger guard is still to dark but the receiver is okay. So the setting were changed again and a light diffusion card was place in front of the receiver.
ISO 400
F 10
1/250
DSC_4004sa
DSC_4003sYou can see the lever and trigger guard much clearer.
The next trip will be to buy back ground paper and try again. There is a lot to taking good pictures and I am a slow learner, but I still keep trying.

Sunday answer 2-15-15


This is a bolt to the Brondby rifle in 7.62×25.

IMG_0295s

IMG_0294s

IMG_0292s

IMG_0291s


It was another trials rifle that was made in limited numbers.

pattern roon 2 025cs

The rifle fired from an open bolt ,which unfortunately means that I can not made one here. It is a gas operated rifle that uses a vertical cam locking mechanism.

Bolt and carrier together.

IMG_0365cThe bolt carrier and firing pin

IMG_0357 bolt carrierThe caming bar

IMG_0310 cam

A close up of the action open and closed.

pattern roon 2 031s

pattern roon 2 027ccs


What is it Saturday 2-14-15

This is going to be tough so here is a hint. It is Italian (ops) British trials rifle. Now I know everyone would have gotten it.

IMG_0291s

IMG_0292s

IMG_0295s

IMG_0294s

Part Two on the Bushmaster Pistol

This is part two on the Bushmaster Pistol with John D. It is not often you have the opportunity to chat with someone as knowledgeable as John is on a topic.  Enjoy the video.


Here are a few of the pictures to go along with the video.

Right side view.

DSC_1157cs

DSC_1161csLeft side view

DSC_1275cs

DSC_1163csThe safety.

DSC_1162sClose up of the Manufacture name

DSC_1160csA view of the rear sight

DSC_1286cs

Fluting Press

More progress has been made on the fluting press.  We have most of the mechanical components made. I will be starting the hydraulics and digital read out soon.

A couple of views of the fluting machine mounted.

DSC_3931s

DSC_3929sClose up of the tool holder. Still a little work to be done to this

DSC_3930sThe adjustable mounting chuck.

DSC_3932sclose up of the location hole and degree angles.

DSC_3933s

Converted Rifles

In this segment we are going to discuss rifles that were converted from one caliber to another to allow them to be used by the country that captured them or to convert them for training. I first got interested in this after reading about the Cuban revolution and the weapons that they used.This first segment will deal with the British rifles that were converted from 303 to 7.92×57 by the Turkish military. Two types of British rifles were known to have been converted. They were the Charger loaded Lee-Enfield and the MK3 SMLE. This set of pictures deals with the SMLE.

This rifle was converted at the Ankara arsenal and is marked on the top of the receiver with the Turkish star and cresent and year. The changes the rear sight has been changed to 2000 meters Mauser leaf type. The front bands, cleaning rod nose cap and bayonet boss have been changed to a Mauser type. The Magazine has been converter to a Mauser type and the charging bridge has been re-shaped to use a 7.92×57 type clip. There has also been added a strengthening rib added to the side of the receiver.

This is a picture of the complete rifle.

DSC_3887csA close up of the receiver and strengthening rib.

DSC_3889cws


DSC_3892csMarkings on the receiver

DSC_3891cws

The Mauser type magazine

DSC_3893cwsMauser type front band,bayonet lug and cleaning rod

DSC_3895cwsMauser type rear sight.

DSC_3898cs

Weekend update

I am a little late posting this, just did not have time last week.

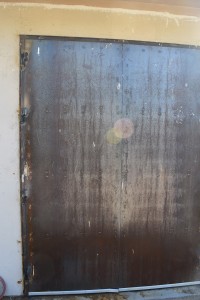
My friend Mac from Texas was up for about a week so a great deal got accomplished that needed to be dome. Mac is a great welder and fabricator and he was used and abused in that fashion. The first and most important task was the steel shop doors on shop 2. The ball bearing hinges has rusted solid and would no longer operate, in fact two of them had broken off the frame. So new hinges were welded in place.

DSC_3885sBoth doors have new hinges.

DSC_3886s
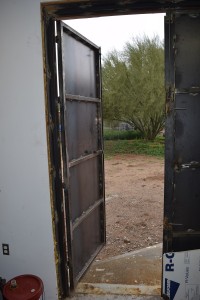
A couple of looks at the inside of the door. The next step is insulating the doors.

DSC_3707s

DSC_3708s
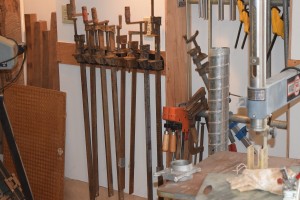
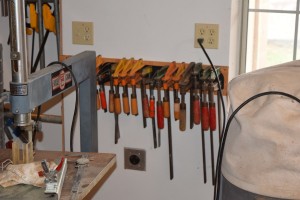
Just so you understand, no one sets around here during the weekend. The new clamp racks were milled to size and hung up in the wood shop.

DSC_3720s

DSC_3719s
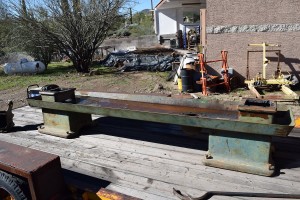
The radial arm saw backing rail was welled up and the support for the bench was completed.

DSC_3721s

DSC_3722sThe next step for the back rail is to be powder coated.

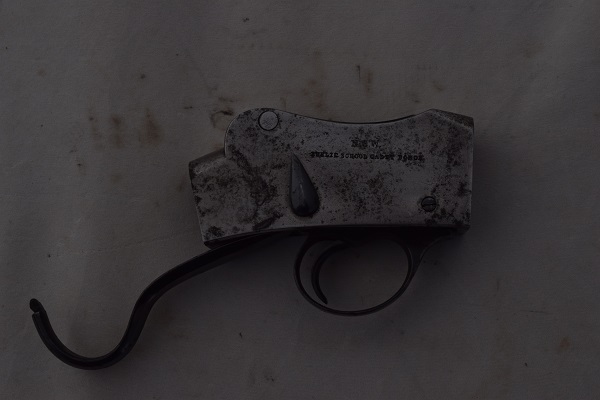
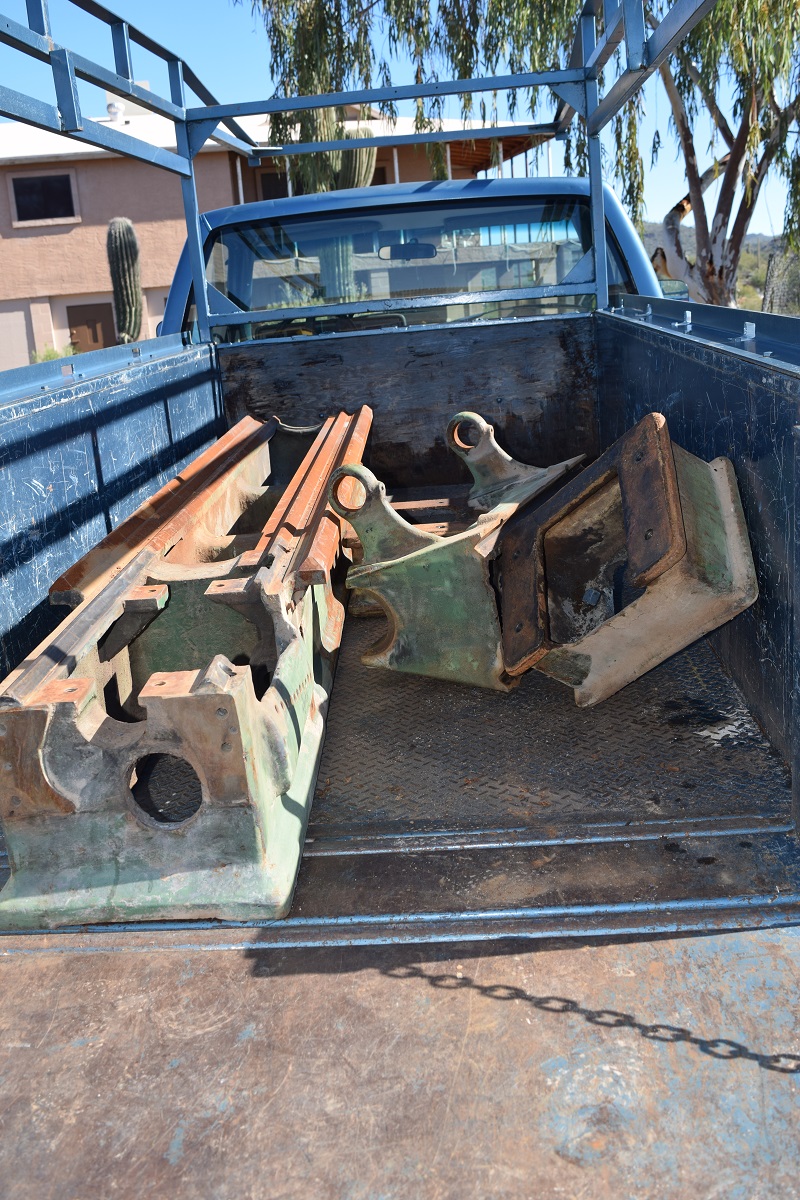
And then because there was nothing else to do we disassembled the old lathe and put it in the truck for a scrap run.

DSC_3733sThe bolts were so rusted that we had to plasma cut them off. Then moving it was fun.

DSC_3727scDSC_3731sThe base and pan are saved for another project.
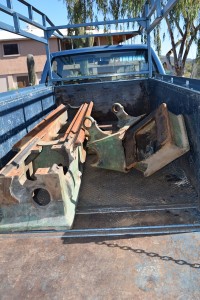
DSC_3732s

DSC_3746soff to scrap.


Sunday answer 2-8-15

IMG_0405s

IMG_0407cmcsThis is the locking device and recoil spring guide for the 7.63×25 Howard Francis carbine. There is only one prototype that is known to have been made in late 1943. It uses a No.1 Mk3. receiver and was converted to a semi-automatic magazine fed carbine.

A black and write photo of the complete rifle.

scan1sThe rifle and it’s basic component parts.

IMG_0401sszClose up of the receiver with the bolt installed.

IMG_0470zsAnd with out the bolt.

IMG_0414lrsAnd a quick look at the bolt.

IMG_0403boltThis rifle is on the bucket list to make. So I started by buying a couple of drill purpose rifles.

IMG_0774s

IMG_0776sI then removed the charger clip guide.

IMG_0765sAnd after machining.

IMG_0769sMore to come on this project. It took a back seat to the VG1-5 project.

It is just to cute not to have one.

What is it Saturday 2-7-15


This is going to be a tough one.IMG_0405s

IMG_0407cmcs

Shooting the 410 Enfield shotgun

After working non stop for almost two weeks my friend Mac and myself decided to take a break and do a little shooting. I needed to test the 410 Enfield shotgun for accuracy, so off we went with that and 3 other weapons. We had a great time with the little Enfield. The accuracy is what you would expect with a smooth bore gun using ammunition that was made  in what looks like in 1960.

The target was shot at 30 yards.

DSC_3747sThis is after two strings for grouping.DSC_3758sNot much difference.

However, I would not want to be hit by one of these slugs. It had not problem going through a 2×4 at all.

DSC_3748sAnd was a danger to close up cans.

DSC_3756sIt also put a heck of a dent into a 1/4″ steel plate.

DSC_3835s

DSC_3838swI actually had more fun shooting this then the two machine guns that were taken or the sniper rifle.