The new computer is not seeing it’s hard drive and not allowing me access to it. So no posts until I can get it straighten out. Currently using my wife’s computer but no access to my files, photo’s or videos. Hope to be back by the weekend.
|
I spent Sunday making the last of the gun racks for the gun room. After the last couple of weekends most of the new gun racks had bin built. I still needed to make a couple of racks for where the books used to be stored. While working on everything else the shorter rifle were just stacked in there.
Pete, a friend of gun lab, Sent me some pictures of a rifle that has come into his shop for repair. When he tool it apart and check out all the components he notice the condition of the locking shoulder. In the following pictures you can see the damage that has occurred to the PTR-44 locking shoulder.
It is hard to determine if the position of the bolt was not properly lock it up. It looks to be to high. This could have been a problem with the parts as they were made, out of speck, or it could be a problem that has occurred over time and usage. Pete ran a file over the locking shoulder and it did not scratch it, a sign that it is hard. It could be improper material and or heat treat of the material. Just be warned and check out your own weapons to verify the condition. Just a quick post and a late one at that. I am a big fan of cut away guns as a learning tool. This is one of a bren gun I looked at while on one of my trips overseas.
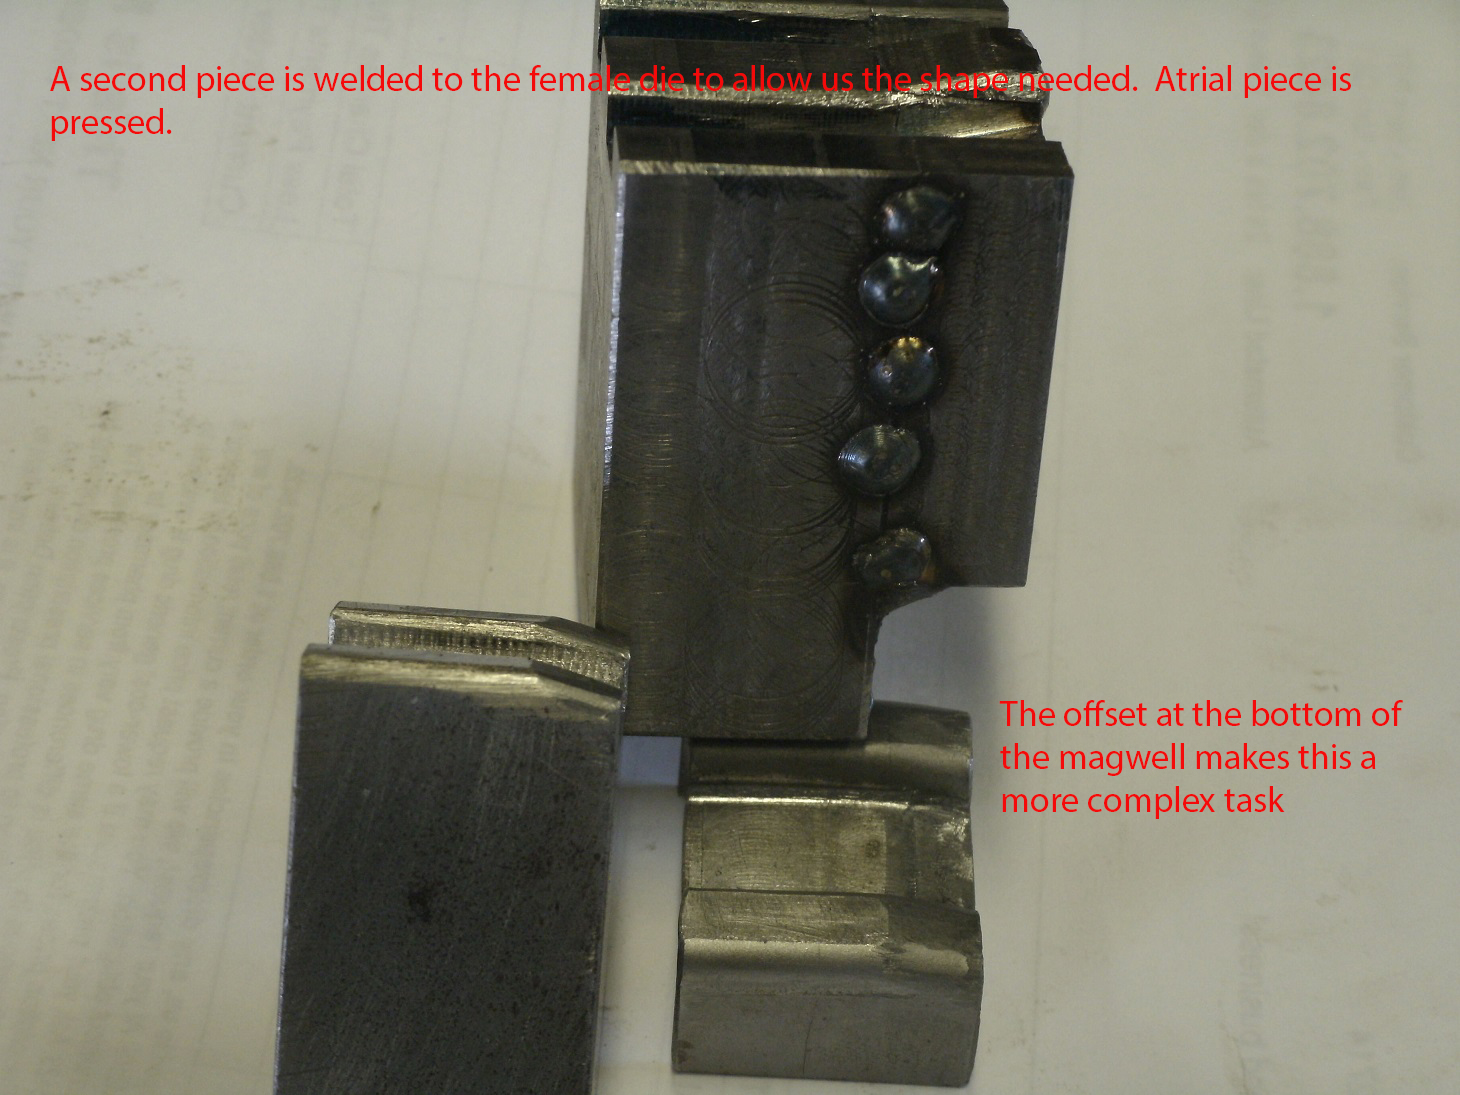
This post deals with just one of the small stampings that goes into making a MP-44. he part being make for this post is the sheet metal reinforcement for the back of the magazine well. This simple part closes the rear of the magazine well, strengthens the rear of the magazine well, addes extra support for the magazine catch area and provides a guide for the magazine.
A great deal of work went on this weekend and part of it was some work on the cnc router’ No, it is not up and running yet, however some of the components that were ordered finally arrived and we were able to start working on it again. The bad news is that some of the items we did order are not the correct parts that we needed. The majority of work completed was minor as well as a number of solid models were drawn to start making our own parts. As is always the case in any shop it needed to be cleaned off first so it could be worked on.
More work will be completed this next weekend, hopefully the rest of the material will be here. With the gun room cleaned up I am now able to get access to some of the reference collection. This post is about the Egyptian Hakim cut away rifle.
Right side of receiver
If any one has a cut away weapon they would like to share please drop me a line. In answering question concerning the post on the AR-10 belt fed light machine gun Ihave spent some time going through the ” The Armalite AR-10″ book. On page 314 of the book is a picture of a MG-09 light machine gun. The funny thing is that I had just seem that same weapon. It was on my back up hard drive and it was in a file of pictures of weapons that I had taken a while back. I had no idea what the weapon was, but that it just looked interesting so I snapped a few pictures of it. This weapon bears a close resemblance to the T44 light machine gun designed by the United States after WW2. These are the pictures I have of the MG-09. If you read the section in the book on page 313 and 314 it answers a few questions on the weapon. A right side view
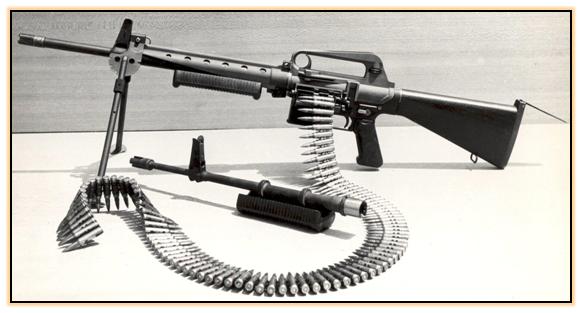
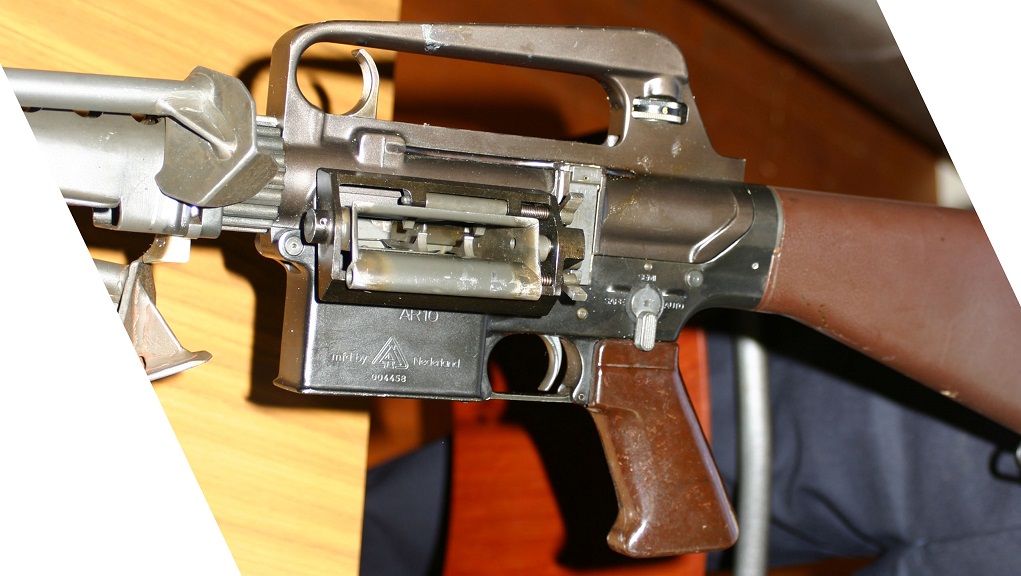
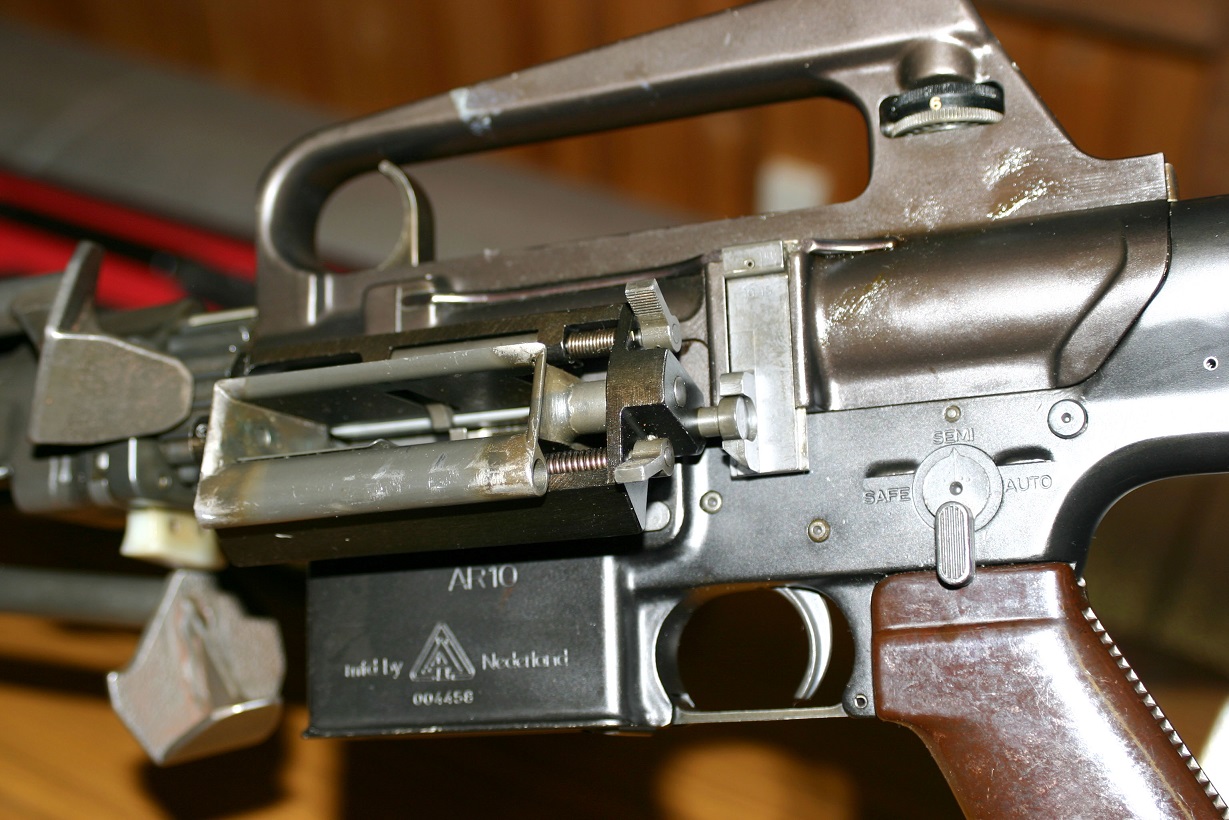
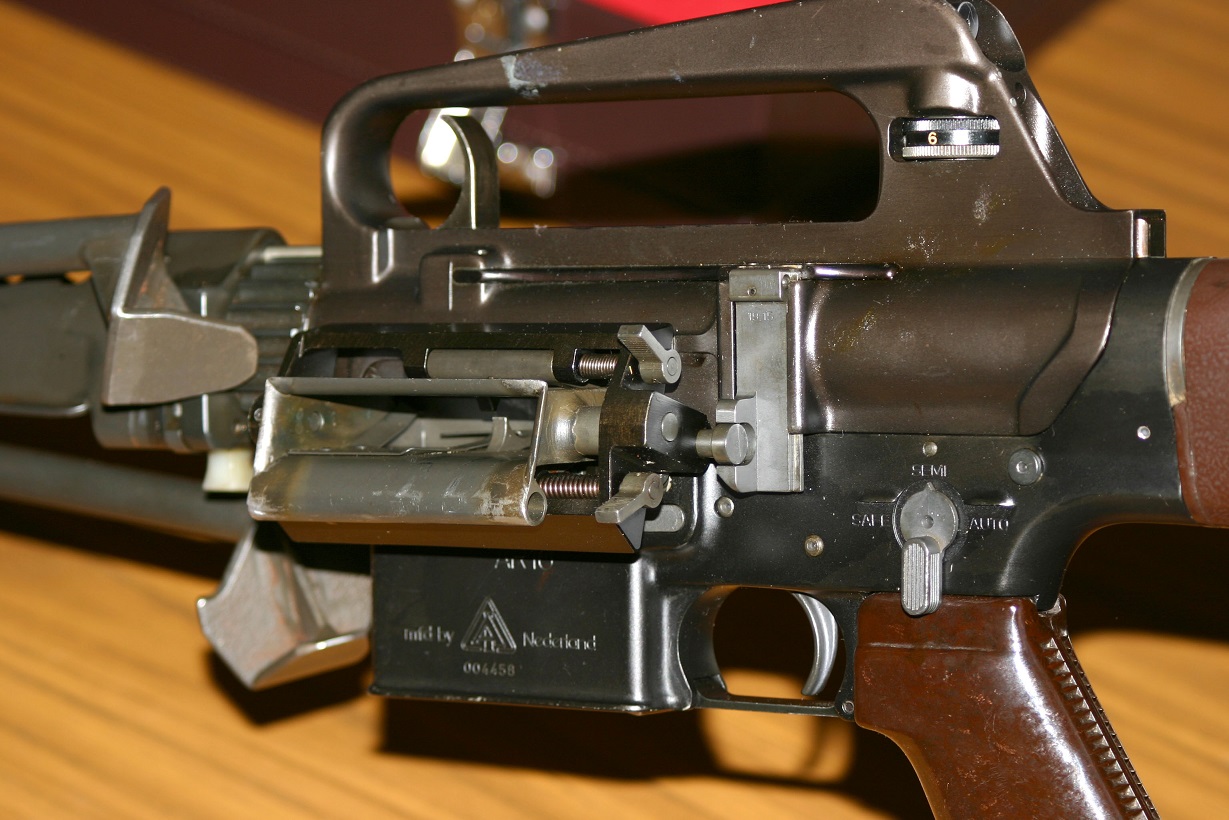
Got tied up so just a quick basic post. On my last trip overseas I was able to snap a few shots of a belt fed AR-10 receiver so I thought I would share them with you. This is a stock photo of the complete weapon.
This shows it open.
These are the photos that I took of the receiver area.
For more great information on early AR-10 rifles pick up a copy of the new book “The Armalite AR-10″ from Collector Grade Publications.
This weekend was again spent trying to make and install new gun racks for the gun room. Not as much work was accomplished as was hope for, a number for friends showed up with interesting and fun toys to play with and take pictures of. In addition it was my fathers 93 birthday and time was spent with him. I did manage to finish out three more gun racks and moved all the guns in the kitchen and living room back into the gun room. I happen to like the Martini-Henry rifle and have a couple of them. So, I had a little space by the closet door and thought it would be a great spot for some of them.
|
||
|
Copyright © 2026 GunLab (KnownHost) - All Rights Reserved Powered by WordPress & Atahualpa |
||