In part 2 of making the AR-180 we will be looking at the upper receiver and the steps necessary to make one. There are a number of rifles that use the same basic design concept. So this build concept would work for any of them.
This is the AR-18/180.
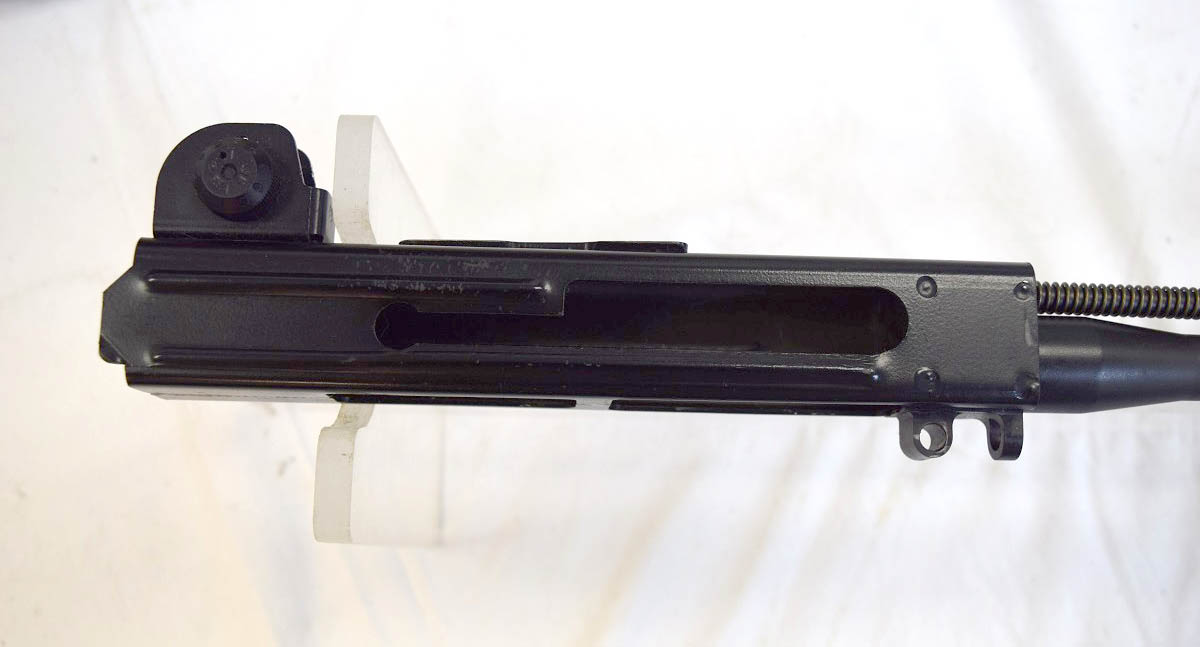
 And a close up of the upper receiver.

A number of other weapons have the same basic upper receiver design. This includes the AR-180B

 The early Bushmaster rifle

 The Leader rifle

 And the Vulcan V15
 Some of these have strengthening ribs while other do not.
This is what the flat would look like after the initial pressing. The holes would be alignment holes for set up and the groves would be pressed in.

This pressing shows the unnecessary sheet metal cut away and the remainder of the holes in the receiver.

The other side of the same pressing

At this point there were probably 2 or three ops performed between this pressing and the last one. The hole has been cut into the receiver for the ejection port and for the bolt operating handle. In addition the first and second bend has been completed.

The other side of the same pressing.

You can now see the upper receiver completely bent and welded.


These 4 holes on both sides of the receiver are to tig weld the barrel extension to the upper receiver.
 The vertical run of holes is to tig weld the “u” channel that the bolt runs along into the receiver.

Close up of the welding performed to close the upper receiver together.
 Our next post on this type of rifles will be the smaller parts and how they were made.
I noticed the flat at the top has the tabs for the AR18 trip included. The rolled version is for the semi AR180.
The TIG welding bead on the bottom is better than the originals I’ve seen.
You are correct about the AR-18 flat.
Add the SAR80 to the list of copies of the AR18/180.
The SAR80 sheet metal lower is even simpler then the Ar180. It uses some standard AR15 trigger parts but has the auto trip in front of the hammer.
It uses standard AR15 magazines with the catch made like the AR180 catch just on the other side.
The carriers, unless you use a dial caliper, look identical.
I have a SAR 80 post coming up.
Thanks for showing the steps for this. How thick of metal are you using? Are you building an entire rifle or just the receiver?
I am not building an AR-180. These are original factory stampings. I find it interesting to see how weapons are made.
The L85 is basically an this modified to bullpup configuration.
AR18
* ST Kinetics SAR80
* ST Kinetics SR88
* Sterling SAR-87
* Royal Ordnance/BAE Systems SA80/L85
* Howa Type 89
* HK G36 /SL8 & SL9
* HK XWM8
* Leader T2 MK5
Where the hell did you come up with original stampings?!?!
A friend of mine has them. I can’t seem to talk him out of them, however he let me photograph them for everyone to see.
Did you by chance get dimensions off these? I would love to make a flat sided version of this upper like the Leader or Vulcan. After seeing and handling the parts, does it look much harder to do than an AK receiver? Perhaps it is the trunion set up that is the sticking point. It just seems so simple to my untrained eye but there must be something difficult about it or is it that is only inexpensive to produce when production is scaled up?
The SA80 first prototype was made from a Sterling arms AR18 reworked into a bullpup format, the production rifle was unfortunately an unlicenced copy full of errors, and the manufacturing cost went into orbit trying to get it to work. The UK had to spend a further 90 million £ years later on to replace many of the working parts, after they contracted Heckler and Koch to find and deal with the inherent faults in it.
I have an ar 180 with no firing pin, what can I use in it or where could I get one from?
Cage,
Armalite’s website still has Ar-180 firing pins for $10.
https://armalite.com/shop/ar-180b-firing-pin/