Categories

VG1-5 update

This last 2 weeks has been spent working on the lower receiver of the VG1-5. This weapon was originally design by the Germans to use the most basic of materials and machined tools. There was a very large amount of hand fitting during the process of making this rifle. All the sheet metal that was stamped was done with basic tooling and each rifle was individually fitted. This is the video that shows the first in a series of steps to assemble the VG1-5.

With this phase completed it is on to the next step.

A BIG THANKS to AXEL

Axel is our friend and a friend of Gun Lab. When I mention that we had gotten our approval from ATFE and that we were starting the build production line he volunteered to come and help. And help he has done. He has been here for two weeks of work and looking and playing with toys from the reference collection and just generally good gun fun. He has been a huge help with getting to the next phase of this project. The amount of work he has done is not is beyond measure. He has performed every task that was asked of him and more. It is hard to believe how fast two weeks have gone by. I am sure he is looking forward to going home just to relax.

DSC_6428s

Older gun making video part 3


Another in the series of older gun making video’s.  This is one on making the BAR.


Life at Gun Lab, studying the MP-44 receiver

Here at gun Lab what we do is study weapons and at any time you could come across anything. A set of EM-2 locking flaps,

DSC_6443cs

a Destroyer carbine,

DSC_6448cs

a Vickers cut away lock,

DSC_6450cs

Hand drawn prints for a weapon

drawings c

or a French MAS 36 22 trainer cartridge adapter.

DSC_6447cs

Anything and everything can be found in my office area. So today we are going to be looking at a MP-44 half of a receiver. I enjoy studying parts and looking at this part it is very interesting to see how the Germans made this part and the interior design that you hardly ever get to see.

DSC_6309csA couple of views of the back of the mag well housing and the added pressings.

DSC_6313cs

DSC_6314csA look at the front of the mag well and the added strengthening plate spot welded on.

DSC_6317cs

DSC_6319csA good view of the press work on the inside of the trunnion and magazine housing area.

DSC_6320cs

DSC_6329cs

DSC_6331csThe out side view. Nice trunnion curvature.

DSC_6334csLook at the internal and external rib stampings

DSC_6335cs

DSC_6336cThis is a nice photo of the magazine housing ribs.

DSC_6337cs

DSC_6346csLook at the transition between the receiver body and the trunnion.

DSC_6343cs

As complex as this weapon is I am amazed at the quality of the stamping. This is actually a beautiful stamping

Older gun making video part2

Today’s post is another of the video’s out there dealing with making the weapons of war in the U.S. This video deals with making the BAR and it.s magazine.

What is interesting is the pressing dies and method used to make the BAR magazine. I find the fixture design to answer question that I have on how to fixture something.

Enjoy the video

AR-180B safety spring bending

A while back we showed you the springs that we obtained for the AR-180B safety and bolt hold open. We bought these with out the tabs pre-bent and trimmed.

DSC_5762sThe next step was to design the tooling necessary to bend the springs for an AR-180B rifle. A couple of pictures of the tooling necessary to bend the spring at a proper angle

DSC_6403s

DSC_6404sNot as simple as it looks.

DSC_6405s

The spring wire put in for the first bend.

DSC_6406sThe tool necessary to bend the spring.


DSC_6407sAfter the first bend

DSC_6408s

DSC_6409sPivot pin moved to second op position.

DSC_6410s

DSC_6411s

DSC_6412sThe bending handle re-installed.

DSC_6413s

DSC_6414sSecond op completed.

DSC_6415sThis is where and how the spring is installed.

DSC_6419cs

A quick video showing how it’s done.

New style VG1-5 trigger guard

After we built the first prototype VG1-5 I just did not like the style and shape of the trigger guard. It caused problems with the location and operation of the trigger and just did not look like the original rifle.

A part of the building process is to make necessary changes when it is required. That is what we did.

With these next two pictures you can see the change.

DSC_6394cs

DSC_6396csA lot of pressure was required to do this task. So much so that it moved the fly press a lot.

DSC_6353sA close look at the female dies

DSC_6397csThe complete die package

DSC_6398csThey are all done and waiting to be attached to the lower receiver

DSC_6356s

AR-180B parts update

With the parts coming back  from the heat treating company on Friday it was time to get busy getting them finished.

This is how they look after heat treating. This is the safety.

DSC_6361csAnd this is the bolt hold open.

DSC_6359csThe first step was to run them through the tumbler to remove the majority of the scaling.

DSC_6363sAfter the tumbler they are then bead blasted to clean them for parkerizing.

IMG_0009sThis is how they look after finishing.

DSC_6387s

DSC_6386sYou will notice the different colors. They were parkerized at the same time with the same solution. The reason for the differences is the material , 1018 vs 4130, and the heat treating performed on the parts.

We are working on the spring bending die today and hope to have the parts set up for sale this weekend.


Older Gun Making Video

I just locate a series of videos that were made concerning making the 1917 Enfield rifle and Browning machine gun. There is no sound as the age of when they were made precludes that. There is however a lot of information in the videos concerning making weapons.

I enjoy studying how weapons have been made in the past. I hope you like the series.

So here is the first of the series, enjoy.

A good video on the making of stocks for the 1917 Enfield

Owen SMG

A friend of mine showed up this last weekend with a new addition to his collection. It is interesting enough that I wanted to share it with you. As with all collectors we not only want the weapon but all the accessories as well. In this case the accessory that he just received was an original transit case used by the Australian military.

DSC_6271csThis chest is really very cool. It holds 3 Owen guns with magazines, slings and cleaning gear.

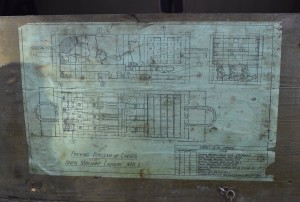
A close up of the lid shows the packing and equipment list and location.

DSC_6272cs
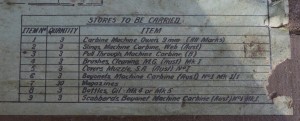
In the lower right hand corner is the actual list of material to be in the box.

DSC_6293cs

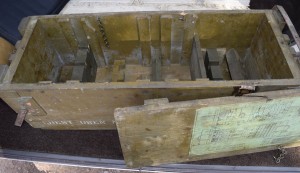
You can see what the inside of the box looks like here.

DSC_6273cs

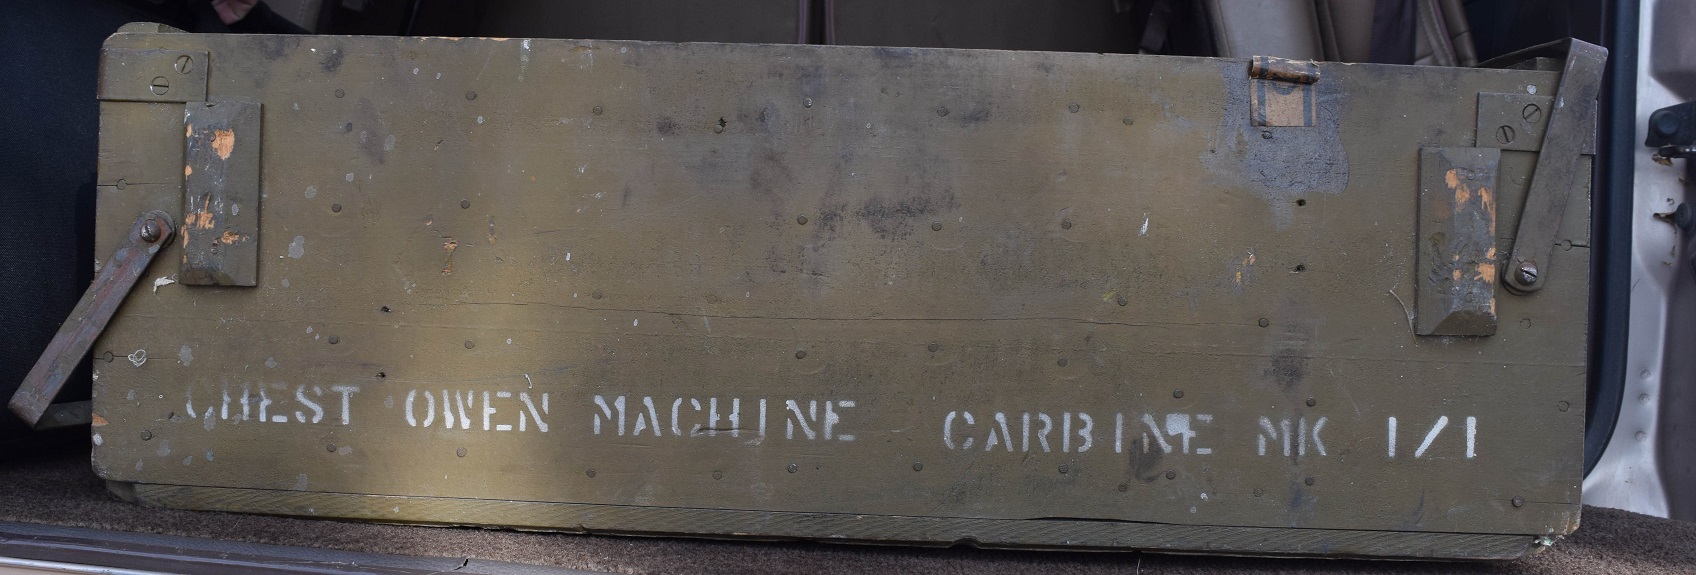
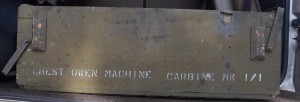
Here are a few more pictures of the out side of the box with the painted lettering on it.

DSC_6275csand another.

DSC_6279csThere was a card attached to the box with the serial numbers of the weapons in them.

DSC_6289cs

To give you the over all appreciation of the box you really need to see it with the Owen inside the box.

DSC_6280s

And a couple of pictures of a real nice Owen.

DSC_6282csThis particular weapon has an additional accessory as well.

DSC_6284csA close up of the markings on the Owen.

DSC_6286csIt was nice to see this weapon. When the temperature drops we will be out shooting it.