Categories

Hotchkiss Portative tri-pod ideas

I own a Hotchkiss portative machine gun and with it now fully operational it has become one of my favorites to take to the shoot.

DSC_6857s

My biggest complaint with it is that I just don’t like getting down into the dirt to shoot it. The butt stock is uncomfortable to use and the little tri-pod that came with it is really useless.

DSC_8251cs

DSC_8252cs

DSC_8253cs
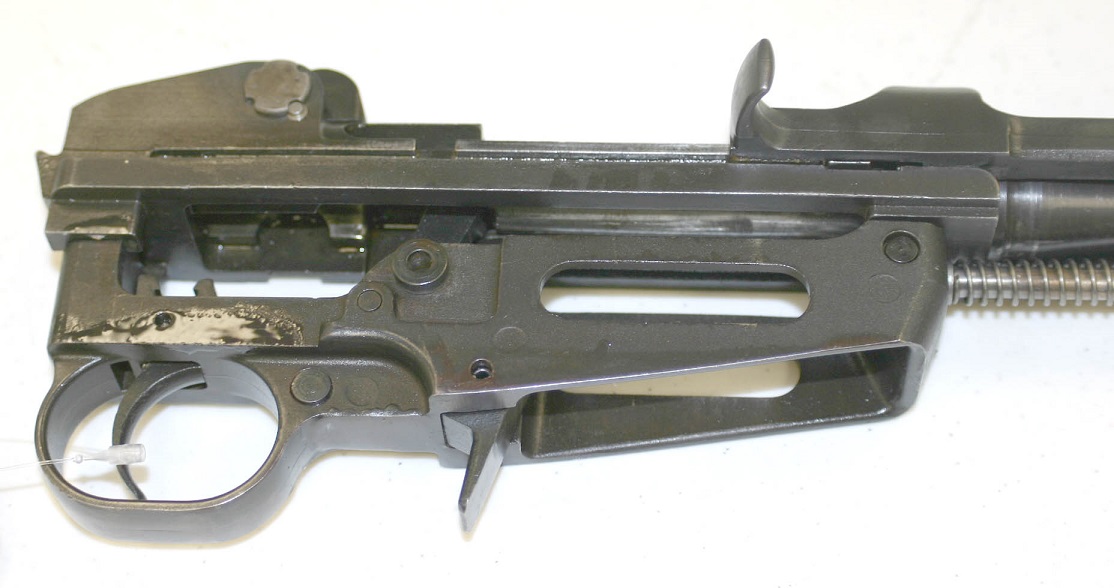
A close up of the yoke.

DSC_8255s


On of my personal projects that I have been working on is designing a new tri-pod for it. I use to own a 1914 French Hotchkiss and let it go a number of years back, a mistake but we all do it. So I have taken four different paths in the design of a new tri-pod for my weapon. There is always the original British design for an adapter to a  Vickers tri-pod.

IMG_1048s

IMG_1049sActually this just looks like a great deal of work and really complex. The patterns to make the bronze castings would take a great deal of time to work out then the fixtures necessary to machine it would be numerous.

Then there is the idea of designing the patterns to cast a new yolk assembly based upon the Hotchkiss 1914 machine gun and the French 1907 St Etienne.

hotchkiss7

IMG_0545

IMG_0615This is a project I might tackle once the cnc router is up and running after the other major projects are completed.

The third idea is one that I found on the internet. It uses a yoke from a Hotchkiss portative and attaches it to a Vickers tri-pod. It is an interesting idea, but I really want something a little lighter and generally when I go to a shoot I usually bring my Vickers as well.

scan_Page_1sSo this leads us to the forth and final concept I am thinking of. This is using the concept of the Vickers-Maxium light machine gun tri-pod. It could be done by making an adapter to use the original yoke assembly and attaching it to a new column. The idea would be something like this.

IMG_0009cThis yoke would be changed to use an original

DSCF2180csI would modify the legs so they would fold back against the sides.

IMG_0011cA rear basic traversing set up

IMG_0014s

IMG_0013csThe elevation set up would have a handle to make it easier.

IMG_0012c  It would not be done by the up coming shoot, but by the end of the year if I can find any time.


Building an MP-44 semi part 2

This is the second in a series of post of Pete, a friend of gun lab, building his semi-auto MP-44. From our previous post you could see the absolutely dismal condition of the cut up receiver pieces that Pete had to work with.

GE DIGITAL CAMERA

GE DIGITAL CAMERAYou can see from these pictures that there was no back section. So the only answer for Pete was to design the tooling and make a new rear section. This is that post.

In this photo you can see the style of the female die with the cuts for the ribs to be pressed in.

GE DIGITAL CAMERAAs with all stamping work to obtain the best possible product you must have a flat that is the same and you must have a method of properly locating that flat.

GE DIGITAL CAMERAThis male stamping die is much more complicated to make then most people think. All this tooling was made on a manual vertical mill.

GE DIGITAL CAMERA

With any press tool you have to have guide and alignment pins to obtain a quality product.

GE DIGITAL CAMERAPete does all his pressing on a simple shop press.

GE DIGITAL CAMERATo fabricate the rear pieces it take multiply set up’s.

GE DIGITAL CAMERA

GE DIGITAL CAMERASome real nice tooling to make his rear section.

GE DIGITAL CAMERA

GE DIGITAL CAMERAThis is not a simple process to make the rear sections.

GE DIGITAL CAMERA

GE DIGITAL CAMERAYou can see for this final photo the quality of work that Pete produces.

GE DIGITAL CAMERAIf anyone is interested in a replacement section drop me a comment and I will forward it to Pete. He has a few of these left.

Barrel cleaning.

I bought a large quantity of MG-13 and 15 barrels a while back. They were bought for the VG1-5, the 05, the 06 and any other 7.92×33 rifle project that I could think of. The first batch of 25 that I got when I cleaned them up were like new barrels. So like an idiot I thought all of them would be that way. After we did the first couple of ops on them we found a bad one. The work was halted and this last Saturday I cleaned the bores on every barrel I had.

The first thing to do was set up a solvent soaking tank . This was dome out side because of the fumes.

DSC_8143s

Next the cut barrels were cleaned and the bad ones separated from the good. The good news is that most of the barrels that we cut were good.

DSC_8141sThe bad news is that some of them were not.

DSC_8142wsThen all the rest of the barrels were cleaned and checked.

DSC_8140ws

DSC_8145wsThe bad barrels with not be used as barrels but the steel is still good so I will use them for other things. The okay but not great barrels with be used for some odd project for my self. All in all how much fun can you have spending a day cleaning barrels, 150 of them. My hands still hurt.


Working on the MP-44 trunions.

We have started on Pete’s, a friend of gun lab, new 4140 MP-44 trunions. This series of videos and posts is the process we used to make them.

First the video.

Here are the pictures going over the changes and the steps we took.

DSC_8118ws

DSC_8119wsWe needed to change the depth of cut for the locking shoulder

DSC_8122wsWe also did not put in the chamfer on the back of the block

DSC_8123sSet up for ops one and two.

DSC_8096ws

DSC_8095cwsAll of the trunions have now gone through ops one and two

DSC_8094cwsOp 3

DSC_8102cwsthe bored hole and start of gas tube cut out.

DSC_8100syou can see the finish of the bored hole and the step for the barrel

DSC_8099sAll the 4140 and test trunions have now completed op 3.

DSC_8154s

DSC_8155s

OP 4 is coming up and will be next post on the MP-44 trunions.

Hotchkiss feed strip ammo box

I happen to own a Hotchkiss portative light machine gun. Now that I have it working, with the help of my friend John, I find it one of the more fun guns to shoot.

DSC_6857s

So since last December I have been working on a couple of accessories for it. Well it happen that on Sunday I had a little Chuck time and went out and finished one of the accessories that I have been meaning to build. In this case it is a feed strip ammo box for the gun. I have looked at the original design and want to make something that would at least look time period correct.

I did not like this style of box.

IMG_0523A couple of pictures of an early American feed strip box.

IMG_0527Another view. This basically the style I wanted.

IMG_0526A Japanese ammo box. I found this one to be to basic.

IMG_0529

In my collect of old ammo boxes I had a couple of Czech 8mm wooden boxes that were almost perfect in size.

DSC_8149s

DSC_8150s

DSC_8151sA quick check with a few strips of 303 showed that this box would be excellent.


DSC_8053s

So some measurements were made and a solid model was made to allow be to design the spacers.

hotchkiss ammo bos spacersThen it was out to the wood shop to have a little fun. Now on to finding material from the pile of scrap stuff that I have. The side panels came from some material that Axel, a friend of gun lab, found on his last trip out to Arizona.

DSC_8148s

The dividers were already in my scrap pile from some cabinet building I did a while back. As is always the case nothing was the correct thickness, but a trip through the planer solver that problem.

DSC_8146s

Once it was the correct thickness it went to the table saw for the width then off to the radial arm saw for length. Cutting the groves was a little bit of a challenge as I don’t have a router table. A little changing on the radial arm saw and we got the dado blades from the table saw to work on them. Next a real basic fixture was set up on the saw and we cut all the groves to the proper depth and spacing.

DSC_8147s

So now this is the final product. I need to add a felt pad on the bottom of the trays as soon as I find enough. I have a few pieces of felt from 303 Vickers ammo cans, just not enough.

DSC_8152sA fun project and it will definitely make it easier on range day with the Hotchkiss.

VG1-5 update lapping the bolt holes.

We are making head way on the VG1-5. There are a lot of small steps that take a great deal of time to accomplish. In this case it is the two hole on the bolt that lock it into the upper receiver and hold the firing pin in place.

A quick video.

This how the bolts looked as they came back from heat treat. These are the two test bolts that were sent along to test the heat treat specs. You can see the marks on them to differentiate them from the actual rifle bolts.

DSC_8124ssThis is an actual bolt after cleaning.

DSC_8110cwsThe two holes that were undersized after heat treat. These bolts are made of 8620 and case hardened to .020 deep.

DSC_8111cwsThe series of reamers that we used to try and open the holes.

DSC_8113cwsA new lap as received from the supply house.

DSC_8105cwsThe adjustable lapping tool

DSC_8108cwsSome of the laps that we went through bring the holes up to the proper size.

DSC_8106cwsThe gauge pins used to test for proper size.

DSC_8112cwsIt actually took a couple of weeks off and on to finish this step. The reason for this was testing the different processes necessary to provide a correct product.

Building a MP-44 semi part 1

In previous post we showed the process of machining out a MP-44 trunnion. To test that our trunnions are correct Pete, a friend of gun lab and owner of the trunnions, has started a project of rebuilding a badly torched cut receiver.

It must be stated up front that Pete is licensed to manufacture weapons up to  and including machine guns. This rifle however is being made as a semi auto only and not a machine gun.

This article is a number of posts as the work required to rebuild this rifle is extensive. You can see from the Photo’s just how badly it was destroyed.

GE DIGITAL CAMERABy most peoples standard this would be just junk.

GE DIGITAL CAMERAHowever, to a master metal man this is just a challenge.

GE DIGITAL CAMERAA great deal of fitting and fixturing is required to assemble this receiver.

GE DIGITAL CAMERA

GE DIGITAL CAMERA

GE DIGITAL CAMERA

GE DIGITAL CAMERA

GE DIGITAL CAMERA

GE DIGITAL CAMERAA fixture is made for everything

GE DIGITAL CAMERAIn the next installment we will discuss making the new back piece.

More on the Japax wire edm

This is another installment on the Japax wire edm at gunlab.net. When I bought this machine from an auction house last year it did not run at all. The plan was to get it operational if possible with the least amount of money. Thus far I have replace a number of the switches. This was the first necessary to get it working. All the pumps were taken apart, cleaned and tested so they now work. A new monitor and circuit board was gotten in from McWillaims and it works great. The wire feed system was adjusted to stop the problem of the wire running off the feed rollers. And this last weekend we finally got power to the cutting wire. This is a big step toward actually running the Japax wire edm. Here is the video of that process.

CNC Router update

I just recently got the last of the control circuit components in for the cnc router. We replaced the older interface with the computer with a new smooth stepper. Sunday I finished wiring it up. This is the basic wiring diagram for that operation.

JINAN2ESS.brd

This is how it looks now.

DSC_8089s

A close up of the smooth stepper.

DSC_8090s

This next weekend it will be mounted in the cabinet and I will start wiring up the motor drives.


Gordam Ingram

Today’s post is about a series of rifles that I have read about but never had the opportunity to look at until just recently. I thank Reed Knight for letting me have the chance to examine the rifle when I was down at his place a while back.

So lets start with a short write up of the rifle.scan0001_Page_01s

scan0001_Page_02sThere is not much written about his rifle designs and what is available is in Tom Nelson and Gary Paul Johnston book The World’s Assault Rifles.

scan0001sAnd in Frank Iannamico and Don Thomas book. the Mac Man

scansIn 1976 Mr. Ingram brought up the idea of a multi-caliber design rifle. Using the basic design of the M-1 carbine action and receiver he re-design the rifle to allow using more modern manufacturing processes. The receiver and bolt were to be investment cast of 4340 steel. The remainder of the parts were to be made of die cast aluminum or high impact plastic.  He kept the tried and true wood stock instead of changing to a plastic or sheet metal stock. The gas system was changed to long-stroke system. Initially design in .223 and then in 7.62×51 he later added 7.62×39 in the caliber line up. There were not many of the weapons ever made and the rifle ended up a foot note in history.

Now to the pictures of this interesting and unique rifle.

This is a side view of the .223 version

IMG_0166cs

IMG_0165csThe following pictures are of the 7.62×39 version

IMG_0212cs

IMG_0210csYou can see a lot of the M-1 carbine and M-1 Garand in this rifle.

IMG_0201cs

IMG_0171cs

IMG_0170cs

IMG_0181cs

IMG_0180cs

IMG_0179csThe bolt comes from the M-1 carbine.

IMG_0175cs

IMG_0174cs

IMG_0172csA few pictures of the gas system.

IMG_0169cs

IMG_0168cs

IMG_0167csWith so few guns ever being made and the political upheaval that was going on at the time the bugs were never totally worked out.