I kind of like the look of the type 63 rifle and a goal is to eventually make a semi-auto ATFE legal one for my self.
 It really has a nice look to it.
 A couple of close ups.

 These last 4 photos were pulled from the internet.
So I have had a quest for the last 15 years or so to obtain type 63 parts. Not the easiest task. This last week I was able to obtain a few more parts for the type 63 Chinese rifle.
My stock as it sets now is:
8 barrels.
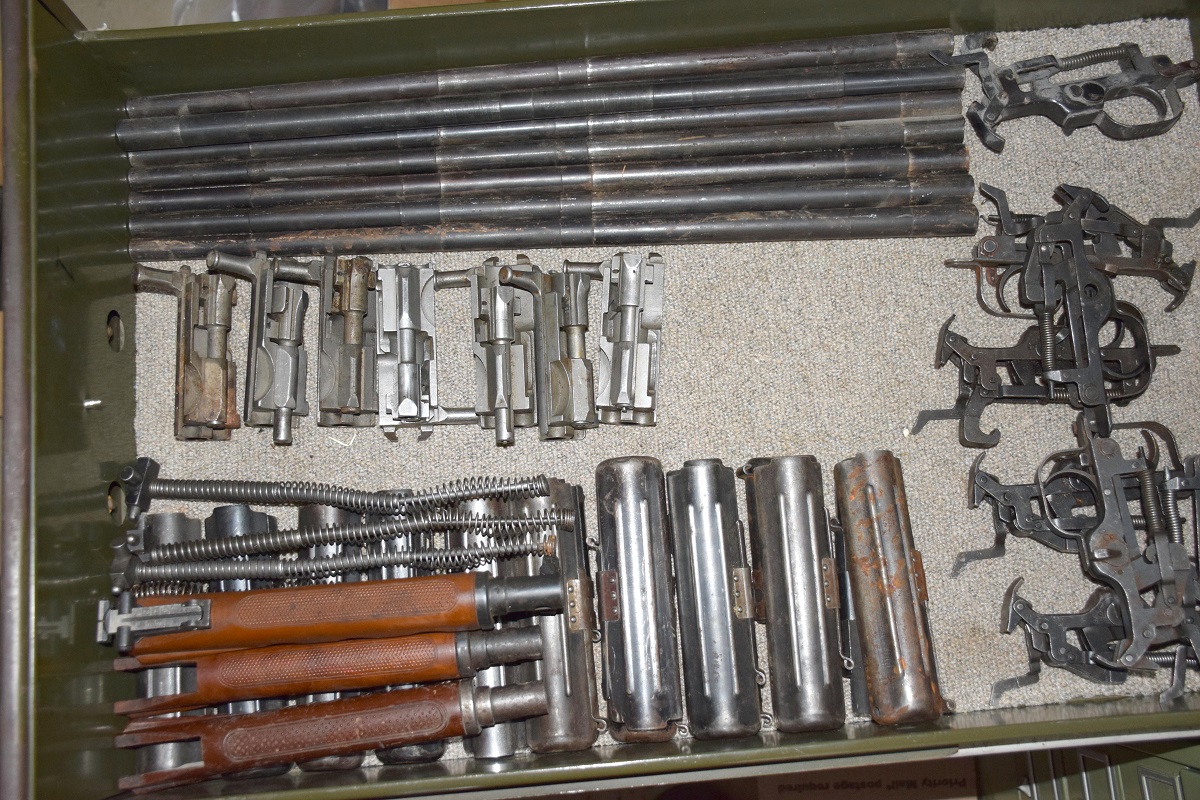 Seven complete bolts.
 More then enough top covers. Interesting that there were two different upper hand guard designs. I still need to make some more recoil spring brackets.
 8 fire control groups
 I have enough front hand guard sheet metal pieces as well as gas pistons and locking pins.
 Sks bayonets and springs and latch mechanism. The bayonets need to be re-ground and shortened but will work. I am going to cut off the latch mechanism on the sks and weld on a type 63 mechanism.
 I have 2 stocks and a stock duplicator. I can make the rest of the stocks I need.
 A great little piece of a cut off end of a type 63 barrel. I will have solid models of both of these parts soon.
 A close up of the type 63 lock up and the sks lock up on the bayonet lug.
 This is a Chinese folding bayonet for the AK-47. This is still available even if it is quite expensive. I will order one this next week to have to use as a pattern.
 A view of the gas block,rear sight base and gas system, this one is missing the gas tube. I do have 2 gas tubes to use as patterns.
 A close up of the gas block
 I am hoping that one of the readers of this happens to know of or own a type 63 and can take me some detailed pictures of the receiver of the rifle, hopefully with some basic measurements. I could also use some pictures of the gas block with measurements. With any luck I will be going to England this summer and have an opportunity to look at one at the pattern room.
This will be a project in the future.


