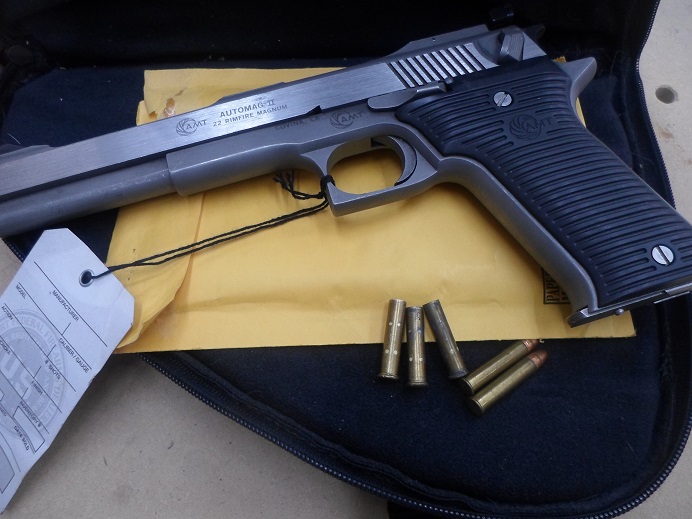
AMT Automag II – replace safety lever
A few days ago a friend left one of those Automags on my work bench.
“Just needs the broken safety lever replaced and doesn’t eject properly.”
He supplied a new safety lever and two springs and bearing balls (BB) each.
Ok, first thing I always do is checking online to see if anybody posted some info on this.
There was a promising video headlined “AMT Automag II Full Disassembly”.
Sadly it leaves the disassembly part for the slide completely out because it’s “a PITA”.
Well, somebody built it so somebody can take it apart.
First you have to punch out the roll pin that serves as axis for the rear sight.
Since I’m German pins get pushed in from the right side and out from the left.
Of course this didn’t work. Trying from the right side worked hassle-free though.
Heck, these things were made in California so everything is possible.
PIC 1

After removal of the roll pin turn the elevation screw on the rear sight to max elevation.
The rear sight should come off now. Make sure you don’t lose those both tiny springs underneath.
PIC 2

Now you can push out the firing pin retaining pin from below. It doesn’t need to go out all the way.
PIC 3

Now pull out the firing pin. Shaking out the remains of the broken safety lever and ready to go!
Put the safety lever detent spring in the corresponding hole. Now try to place the 2.36mm dia. BB on top of it… It won’t stay there – guaranteed.
To avoid endless searching for the BB that fell on the floor to be gone forever, you clamp the pistol slide inside a plastic bag. This way the BB is landing in the bag and we are happy.
PIC 4

To keep the BB in place and being able to push it down in the detent spring hole you’ll need a fixture.
Since I’m not planning on doing this ever again (!!!), a simple piece of round wood I found in my trash can was used. Needs a cutout about the diameter of the BB and slightly off center since that matches the location of the detent spring hole in the slide.
PIC 5

Then clamp the slide in the bench vise slightly canted to the left side so the BB will stay in position.
PIC 6

BEFORE you continue make sure the BB is going all the way in the detent spring hole!
Both springs provided were either too long or the hole too short. Remember – made in CA!
So I slightly shortened the spring (flattened end towards BB) till the BB was clearing the hole for the safety lever.
With the fixture in place (press fit to the safety hole) the BB has no other way to go when you push it down with a punch.
My friend who dropped that project on my table just showed up and told me: “You need new punches, they suck!”
I guess he grabbed the one I had modified for this exercise and hadn’t been changed back to normal so far.
You have to push down the BB at a slight angle approaching from the cutout for the hammer.
So it helps if you angle the tip of the punch accordingly. Using this specialized tool on something else might become a lil frustrating I can imagine…
While keeping the BB pushed down, you pull out the fixture and (try to) push the safety lever (pointing in the 12 o’clock position) in.
You still will have a hard time to get it in so a slight chamfer on the safety lever as pictured helps a lot.
PIC 7

Once I got the safety lever in it worked nicely – so far…
BUT after installing the firing pin the safety lever was only rotating about two thirds!
The cutout for the firing pin was not radiused so the safety could not properly rotate under the firing pin and was off center same as the chamfered area on the rear of the safety!
PIC 8a and 8b


That required some grinding and fitting on the safety lever – after removing it from the slide!
So BEFORE installing the detent spring and BB, test the interaction between safety lever and firing pin! Saves you the trouble to do it all again.
BTW – it can never hurt to have a large reference collection at hand where you can simply pull a similar gun for comparison!
PIC 9

Word of caution – NEVER let the hammer fall against the engaged safety at full force!
That’s very likely the reason for the broken safety on this gun.
Engage the safety, pull the hammer slightly back, then pull the trigger and gently lower the hammer.
The safety on this gun doesn’t offer a decocking function. But even with other guns that feature that, I always keep the hammer back and lower it slowly after engaging the safety.
I have experienced damage to the safety at the Walther PP/PPK and P.38/P1 if you just let the hammer drop.
The only gun with slide mounted decocking safety that seems to withstand permanent hammer dropping is the Beretta M9. On the other side I don’t know what the maintenance schedule on these guns is with precautionary replacement of the safety lever.
The only pistols where the decocking function is properly desgined IMO are the SIG 220 series guns and the Sauer & Sohn 1938H of course which was their inspiration. Here the hammer is actually gently lowered against the force of your thumb pressing down the decocking lever.
This is NOT the case with some other guns with similar decocking levers like Astra 80/90/100 or Taurus 92/99.
Finally the test firing to see about the “ejection issue”.
With some random .22 WMR ammo it worked right from the start.
PIC 10
Happens all the time when people show me guns that don’t cycle properly.
Self-loading guns esp. recoil operated ones (with the lone exception of inertia systems) need to be firmly supported (hand/shoulder) to cycle and eject/feed.
Time to wrap this gun up and hope to never touch one of those again!
Nice post. Glad your back.
I keep trying to convince Axel to write more posts on the gunsmithing projects that he does, but he says that no one even reads them so why waste time doing them when he could be in the shop having fun. He actually does some very interesting work and some very detailed and difficult projects.
I loved this article!! Thanks SO VERY MUCH!! I own one of these pistols, and there’s VERY little info on them!! THANKS AGAIN!!
Axel,
I loved this article!! Thanks SO VERY MUCH!! I own one of these pistols, and there’s VERY little info on them!! THANKS AGAIN!!
Thank you for this article I have a friends pistol that this has happened to, and thank you for the info about pulling the trigger that might have broken the safety to start with, I will let him know to make sure this don’t happen again. I have never pulled the trigger on a 22 to release the hammer. Some people don’t know or have never been taught that tid bit of info. Thanks again for this article
Thank you so much for this post. You are quite literally the only person with a slide disassembly. I have a hunch my firing pin blocking portion of my safety is broken off from a previous owner dry firing it. Unfortunately I assume that Ill have to do this slide disassembly and I desperately needed pointers. I wish there were more pictures of the safety engaged and not engaged.. but Im pretty sure the small tang that covers the firing pin has snapped off with mine.. I just can’t tell since there are not a whole lot of reference pics on the web.
But again, thank you for this post!
I need a safety for AMT automagII .22mag. 4 1/2 barrel. Any one know where? TY Dave
Hey dave, try:
Jacks first inc!
Buy some spare safety springs and detent bearings as they can go flying. Best to have spares.
I read it all, you probably saved me a bunch of aggravation, I’ve been dropping the Hammer down repeatedly on my AutoMag .22 WMR ,