In this write up we are going to look at the smaller parts and how they were made. The majority of the AR18/180 was a stamped weapon with minimal machined components. These are the stamped parts we are going to look at today.
The first part that we are going to look at is the magazine hold open lever.
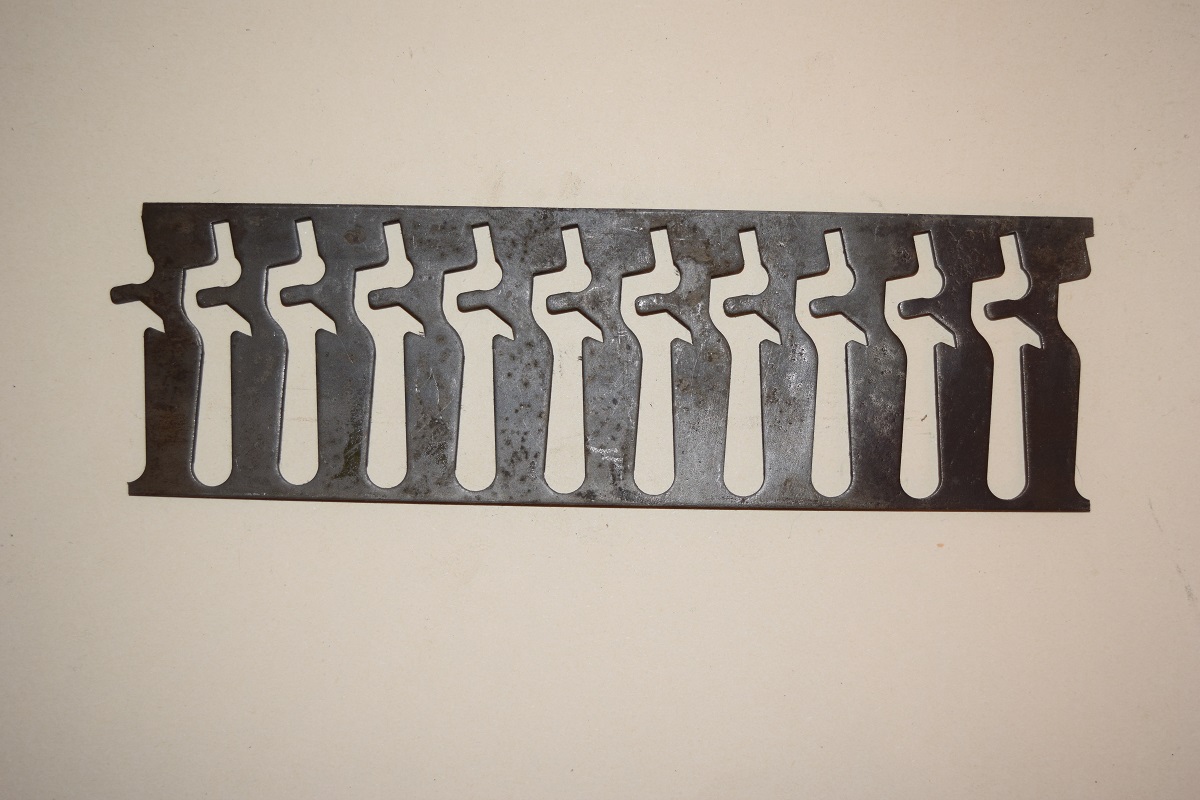 Close up of the stamping strip.
 The actual part.
 The bending fixture.

Next is the dust cover.
 What the stamped part looked like.


Next there is the lower receiver strengthening support.
First is the stamping strip.

 Final part as it comes off of line.
 This next part is the trigger stamping cut out.
 This is the sear stamping cut out.
 This is the butt stock attachment piece.
 The final stamped piece we are going to look at is the scope base.
 And the actual stamped piece.
 I hope you have enjoyed this little walk through stamping. Thanks for stopping by.
Excellent article. I’m actually checking the site regularly for the next iteration.
I think where they used the stamping press technology in the 1960’s using expensive dies. Its now begging for a CNC laser or plasma cutter which could cut out blanks all day long.
Flat patterns (.dxf) out of Solidworks models sort according to sheet metal gage and hit cycle start, change sheet thickness, cycle start, repeat. Fold,form,TIG.
I’m also loving these AR18 posts, my day job is designing sheet steel fabrications for truck suspensions, so everything looks somewhat familiar.
Thanks for the comments. You are correct in that it is easier and less expensive to water jet the rough shape out then building a cutting die for the limited number that we make here at Gun Lab. I still think you would need to seriously look at the numbers if you were doing thousands. However, with water jetting changes could be made easier and with less expense.